Pi Intruder Detector: 2 - Motion Detector
The code for the article can be downloaded at https://github.com/itip/raspberry-pi-examples.
Introduction
In the second part of this tutorial we are going to attach a motion sensor to our Raspbery Pi. Used in conjunction with the camera module we will be able to take a photo of any intruders!!
What you’ll need
(In addition to the components in the first part of this tutorial)
1. PIR Infrared Motion Sensor
We’re using model HC-SR501.
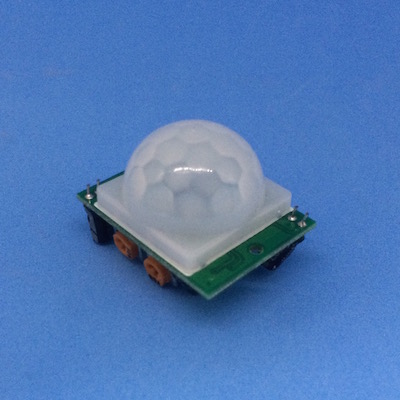
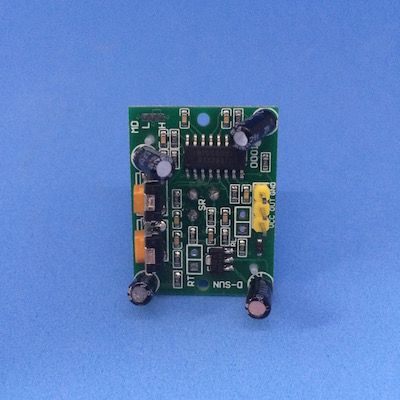
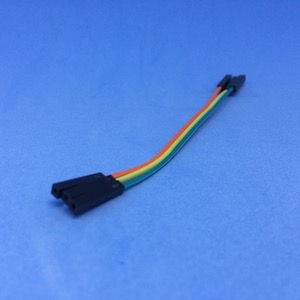
2. Female to female jumper wires
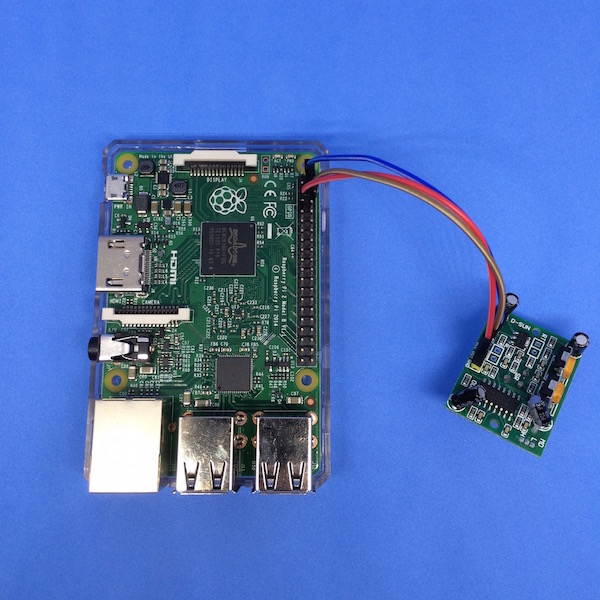
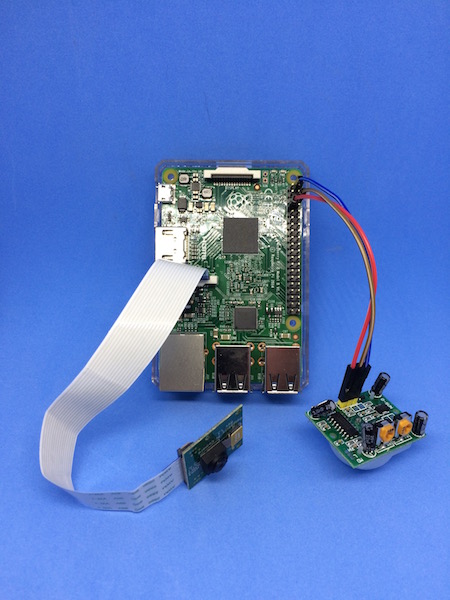
Raspberry Pi and Motion Sensor
- On the motion sensor, connect the “VCC” pin to the 5V pin on your Raspberry Pi (the upper-right pin).
- Connect the middle “OUT” pin to GPIO4 (left-hand side, 4th from top).
- Connect the ground “GND” field on the sensor to the “GND” field on the Raspberry Pi (right-hand side, 3rd from top).
- Run the sample code.
sudo python sensor.py(Note: sudo is needed in order to access the output from the sensors). - When you’re finished, press
ctrl+cto exit.
If you’re unsure which pins to use, take a look at this page.
# sensor.py

import RPi.GPIO as GPIO
import time

sensor = 4

# Set the way pin numbers are read. We want to use the name (Broadcom SOC channel)
# rather than the logical position, e.g. 1st, 2nd, 3rd. See http://raspberrypi.stackexchange.com/a/12967
GPIO.setmode(GPIO.BCM)

# Specify which pin we're going to use. Also add a 10K pull down resistor.
# see http://sourceforge.net/p/raspberry-gpio-python/wiki/Inputs/
GPIO.setup(sensor, GPIO.IN, GPIO.PUD_DOWN)

# Create an infinite loop which repeatedly checks the input sensor/
while True:
   time.sleep(0.1)
   if GPIO.input(sensor):
       print("Motion detected")
   else:
      print('No motion')
Notes:
- Not sure why a pull down resistor is needed? This article on the Sparkfun website explains why.
The above code works fine but it’s not perfect. Under normal circumstances the sensor will be checked periodically but this might not be the case if the CPU is busy running other intensive tasks. Under such circumstances it’s possible that some events may get missed as the operating system is unable to execute your code affter the interval you specified. In other words, if you want to check the sensor after 20ms but the operating system can’t run your code for 200ms then any events in that period will get missed.
We can avoid this issue by making a slight change to the code. Instead of constantly polling the sensor to find out if anything has changed, we can and instead let the sensor tell us when an event is detected. This also has the added advantage of making the code look a little cleaner.
# sensor_event.py

import RPi.GPIO as GPIO
from time import sleep

sensor = 4

# Set the way pin numbers are read. We want to use the name (Broadcom SOC channel)
# rather than the logical position, e.g. 1st, 2nd, 3rd. See http://raspberrypi.stackexchange.com/a/12967
GPIO.setmode(GPIO.BCM)

# Specify which pin we're going to use. Also add a 10K pull down resistor.
# see http://sourceforge.net/p/raspberry-gpio-python/wiki/Inputs/
GPIO.setup(sensor, GPIO.IN, GPIO.PUD_DOWN)

# This function will be called when movement is detected
def motion_detected(channel):
   print("Motion detected")

# Detect rise
GPIO.add_event_detect(sensor, GPIO.RISING, callback=motion_detected)

# Code will keep running until you press the enter key on your keyboard
close = raw_input("Press ENTER to exit\n")
print "Closing..."
Taking a Photo
We now want to take a photo when motion is detected. In order to do this we just need to plug in the Raspberry Pi camera module and add some code to take photos.
This code has a slight change to the way we detect events. When motion is detected our code will sometimes get called several times in quick succession. This could result in our code taking several photos when motion is detected when we really only need it to take one. We can avoid this by using the bouncetime parameter which specifies the minimum amount of time before we want to be notified of a new event.
# sensor_event_photo.py

import picamera
import RPi.GPIO as GPIO
from time import sleep
import time

sensor = 4

# Set the way pin numbers are read. We want to use the name (Broadcom SOC channel)
# rather than the logical position, e.g. 1st, 2nd, 3rd. See http://raspberrypi.stackexchange.com/a/12967
GPIO.setmode(GPIO.BCM)

# Specify which pin we're going to use. Also add a 10K pull down resistor.
# see http://sourceforge.net/p/raspberry-gpio-python/wiki/Inputs/
GPIO.setup(sensor, GPIO.IN, GPIO.PUD_DOWN)

# Set up the camera
camera = picamera.PiCamera()
camera.vflip = True
camera.brightness = 60

# This function will be called when movement is detected
def motion_detected(channel):
   # Take a photo and store it in the current directory
   name = "photo %s.jpg" % time.strftime("%H:%M:%S")
   camera.capture(name)
   print "Photo '%s' Taken!!" % name

# Bouncetime ignores events close together which stops multiple photos being taken.
GPIO.add_event_detect(sensor, GPIO.RISING, callback=motion_detected, bouncetime=200)

# Code will keep running until you press the enter key on your keyboard
close = raw_input("Press ENTER to exit\n")
print "Closing..."
Conslusion
Our Raspberry Pi will now take a photo whenever it detects movement. In the final part of our tutorial we will upload these photos to the web and send an email whenever an intruder is detected.