Pi Intruder Detector: 3 - Web & Email
The code for the article can be downloaded at https://github.com/itip/raspberry-pi-examples.
Introduction
We’re now going to make a website which allows us to view the photos taken by our Raspberry Pi. We also going to make the website send us an email every time an alert is received.
What you’ll need
An Internet connection.
You can use the ethernet port on your device or Wifi. I used the the USB Wifi Adapter for the Raspberry Pi available on Amazon.

Instructions on how to set up wifi can be found on the Raspberry Pi site.
Setting Up Your Website
When it comes to setting up a website, there are lots of different options available. We’re going to keep things pretty simple though and use a service called Parse which will allow us to host our web app with minimal setup required.
1. Create a Parse Account
Go to Parse.com and create an account, if you haven’t already got one.
2. Create a New App
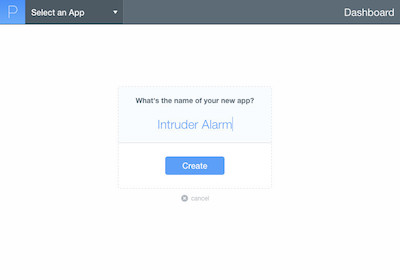
Create a new app. Let’s call it “Intruder Alarm”.
3. API Keys
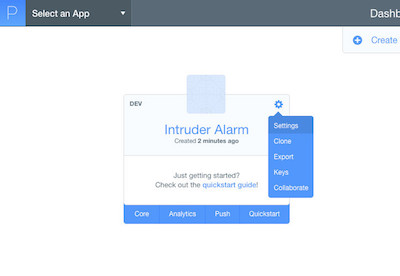
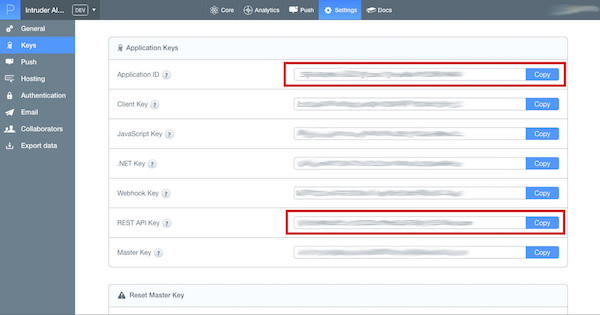
Go to your app’s settings and find the application key and rest API key.
Uploading Photos
After a photo is taken we we’ll immediately try to upload it to our web app. Internet connections can go up and down so there’s no guarantee that the upload will work. For this reason we’ll make sure the code tries to upload the current photo, and and other photos which haven’t yet been uploaded.
When uploading a file to Parse you need to associate it with an object in the database, otherwise it’s not possible to retrieve the photo at a later date. For this reason our code needs to make two calls to the Parse API.
The following code is taken from upload.py. Before using it, make sure you enter your Parse keys into the two variables at the top of the file.
parse_application_key = "<APPLICATION_KEY>"
rest_api_key = "<REST_API_KEY>"

..

def upload_photos():
    # Search 'photos' directory for photos which haven't been uploaded
    for file_name in listdir("photos"):
        if isfile(join("photos",file_name)):
            if allowed_file(file_name):

                print("Uploading %s" % file_name)
                file_path = join("photos",file_name)

                connection = httplib.HTTPSConnection('api.parse.com', 443)
                connection.connect()

                # Upload file to Parse

                parse_url_path = "/1/files/%s" % file_name
                connection.request('POST', parse_url_path, open(file_path, 'rb').read(), {
                       "X-Parse-Application-Id": "SRy8RdMuTcwIKE3jP2imojT0tw6Wv4f5C96VHWGW",
                       "X-Parse-REST-API-Key": "EhSHMXo8fivY1OID3nfMebZqF2BgvjE2cRwtAdmn",
                       "Content-Type": "image/png"
                     })
                result = json.loads(connection.getresponse().read())

                ...

                # Create a new "Alert" object
                parse_file_name = result['name']

                connection.request('POST', '/1/classes/Alert', json.dumps({
                   "name": file_name,
                   "picture": {
                     "name": parse_file_name,
                     "__type": "File"
                   }
                 }), {
                   "X-Parse-Application-Id": parse_application_key,
                   "X-Parse-REST-API-Key": rest_api_key,
                   "Content-Type": "application/json"
                 })
                result = json.loads(connection.getresponse().read())

                ...

                # Success. Everything uploaded. Move file to 'uploaded' folder so we don't upload again.
                if not os.path.exists("uploaded"):
                    os.makedirs("uploaded")

                uploaded_path = join("uploaded", file_name)
                os.rename(file_path, uploaded_path)
If you log into the Parse portal and click on the Core tab you should now see a new Alert object. If you click on the picture cell you should see the photo taken by the Raspbery Pi.

Parse web app
The sample code contains a simple web app for viewing the photos.
1. Set Password
Open app.js and change the helpPassword variable to contain a password. We’ll use this password to access the portal once it has been uploaded.
2. Web App URL
Log into your Parse app, click on the Settings tab and select the Hosting option on the left-hand side. Under Web Hosting, enter a name for your app. This will be the URL which you can use to access your web portal.

3. Parse Command Line
Download the Parse Command Line Tool. Instructions can be found here.
4. Upload App
Open a terminal window (or Command Prompt on Windows)
- Go to the AlertWeb directory in the sample code, e.g.
cd AlertWeb. - Deploy the app,
parse deploy. - Follow the instructions. The first time you upload the app you’ll be asked to enter your Parse username and password, this won’t be required on subsequent deploys though.
Note: for more information on creating dynamic websites using Parse, take a look at this page in their documentation.
5. Check the Portal
Open a web browser and enter the URL you entered in the Parse settings. You’ll asked for a username and password. Enter:
- Username: admin
- Password: (The password you entered in step 1)
To change these login details, just open app.js, change the variables at the top of the page and deploy the app again.
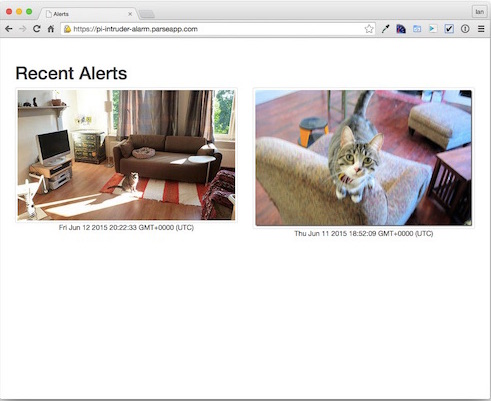
You should now see the photos you’ve taken.
The final step is to send an email when an alert is received. Parse cloud code can’t send emails directly so we need to sign up to an email service. We’ll go for Mandrill.
- Sign up for Mandrill service: https://www.mandrill.com/signup/
- Click on the Settings tab and create an API Key (the name doesn’t matter, you can call it “Emails”).
- Make a note of the key which has been generated.
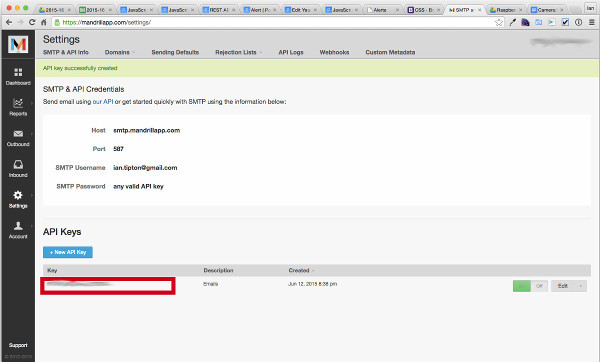
Now open main.js in the web app. Update the mandrillKey variable at the top. Also enter the your email address into the variables at the top (it’s ok to use the same email address in both variables).
/* After adding an alert we'll send an email */
var mandrillKey = '<KEY GOES HERE>';

var emailSender = 'sender@email.com'
var emailRecipient = 'recipient@email.com'

var Mandrill = require('mandrill');
Mandrill.initialize(mandrillKey);

...
You should now receive an email within a few seconds of movement being detected (assuming you have a reasonable connection to the Internet.)
Conclusion
Our intruder alarm is now complete. There’s plenty of room for improvement though, why not…
- Send a text message using Twilio.
- Instead of saving pictures, modify our camera code to create videos.
I hope this has been useful. Feel free to get in touch using the contact details below.